
It’s LIVE!
Here we go, the much awaited piece of marketing tool is finally available on Salesforce Marketing Cloud! 2 days earlier than expected for some of us!
As a reminder, this feature allows Marketers to create emails with fillable forms (directly within the email client!) that, on the push of a button, send information straight into the Cloud! Who said magic didn’t exist?! ^^
However, as Marketing Cloud Specialists (soon-to-be) or Consultants (soon-to-be), we know that there are a few tweaks to be taken into account for such “magic” to happen. In this post, we will delve into this feature, technically speaking, to the extent of the knowledge we have so far, of course ^^. No bullshit!
1. The CloudPage
First thing first, create a CloudPage. It is a mandatory step.
a. Go to CloudPages, create a new collection if you need one, and create an Interactive Email Page.
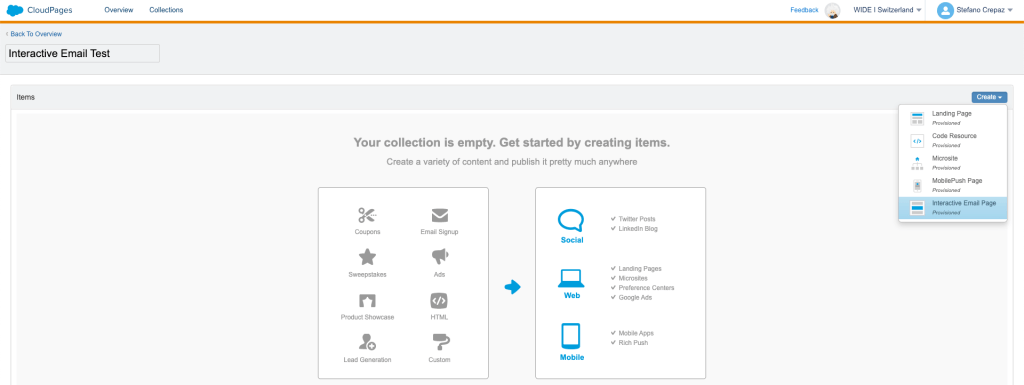
This CloudPage will basically serve as destination page after the customer has filled the Email Form.
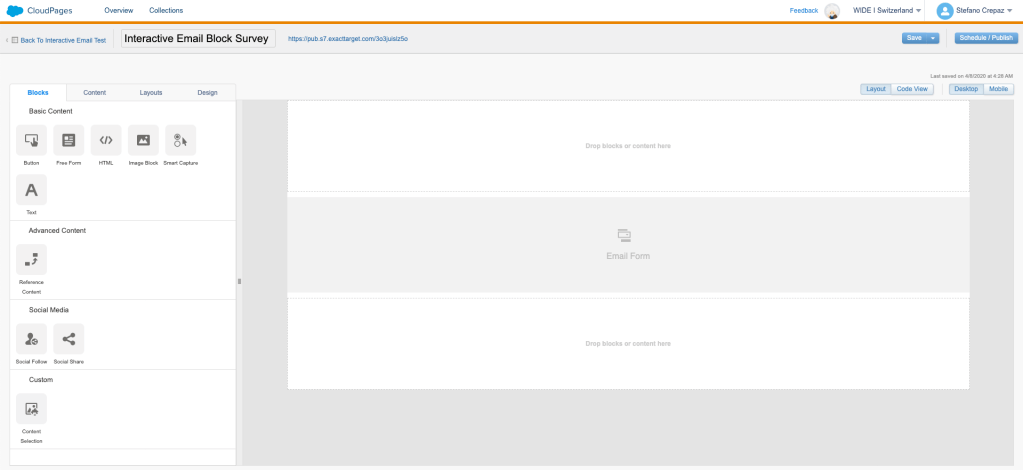
b. Click on the “Email Form Block” in order to edit it (image below).

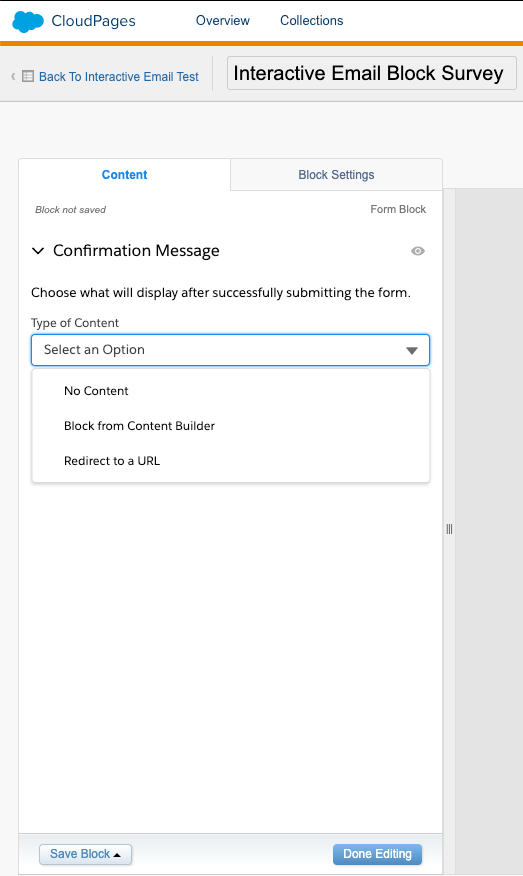
c. At this stage, you will be able to choose the content that will display after the subscriber has successfully submitted the form. That could be either nothing, either a Block from Content Builder (that you will have previously built, separately) or a link to a landing page containing a “thank you” note.
2. Back to Email Studio, in Content Builder!
It’s now time to implement our Interactive Email Form in our nice Email.
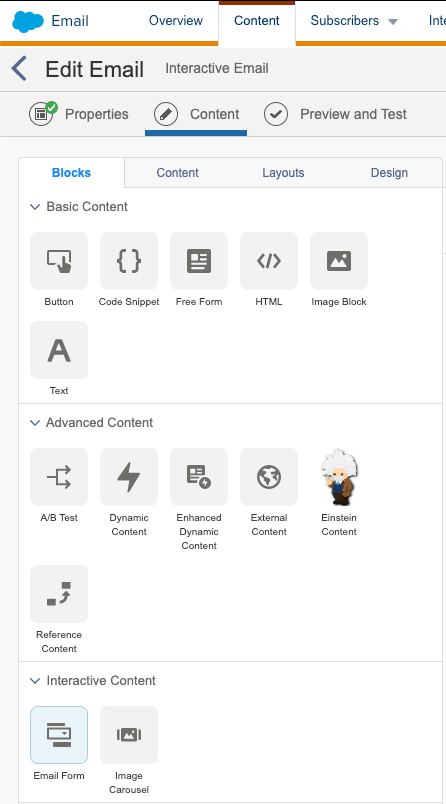
Everything happens in the Interactive Content section, in the Content Blocks available to you. There should be an “Email Form” Block like so:
a. Drag and drop that block in your email layout. You will end up with the following interface on the left hand side of the email you are building:

b. You will be able to choose among different layouts that will ease the form creation or let you build it from scratch. For this tutorial, let’s go with the “Review” form type!
c. The first step you want to complete is selecting the destination CloudPage you previously created! Simply browse the collection in order to reach it ^^
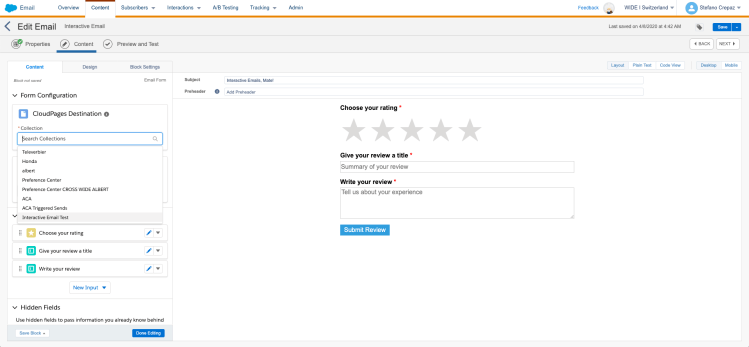
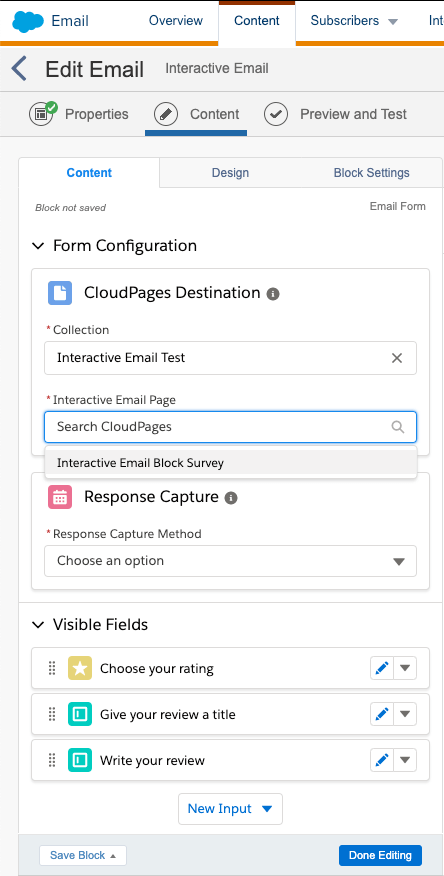
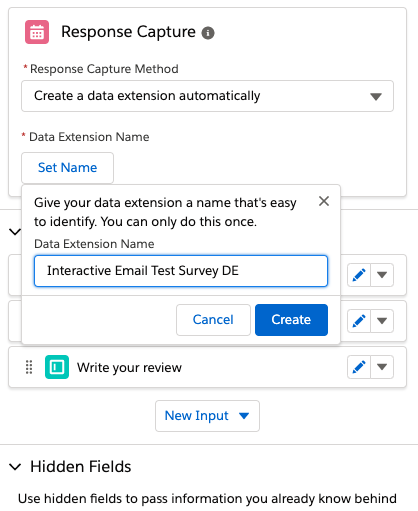
d. Second, fill the “Response Capture” as follows:
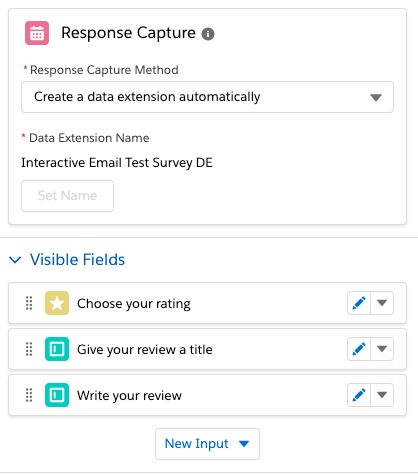
choose “Create a data extension automatically”, if you haven’t created a Data Extension to host the survey answers, yet. You will then have to set a Name. For our tutorial, I chose this option and called the DE “Interactive Email Test Survey DE”
else, choose “Use an existing data extension”
Let’s stop and make a step back to see what we have so far:
- We have a CloudPage that serves as destination page after form filling
- We have a Form Block within your Email connected to the destination CloudPage
- We have a Data Extension created to host this survey answers. This Data Extension is EMPTY: it doesn’t have any attribute nor records (obviously)
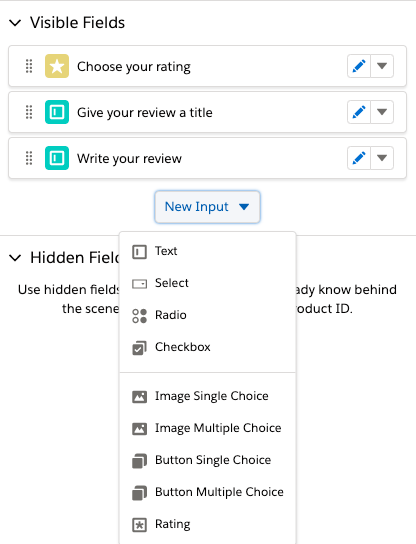
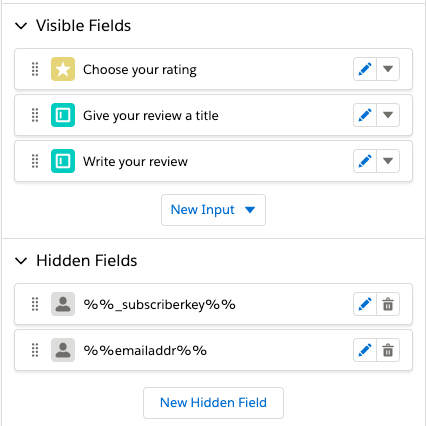
e. The next step is to delve into the different fields that you want in your form. In this case, we already have three fields automatically created by the “Review” template chosen at the beginning.
f. In order for this form to work, you need to affect each field of this form to an attribute of the data extension, wether the field has already been created by the template chosen or it has to be created “by hand”. To do so, click on the blue pen on the right of the “Choose your rating” field. You will end up with an error, but no worries! ^^
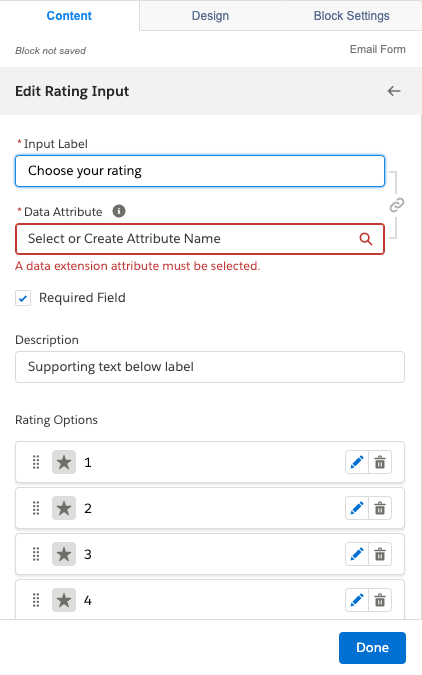
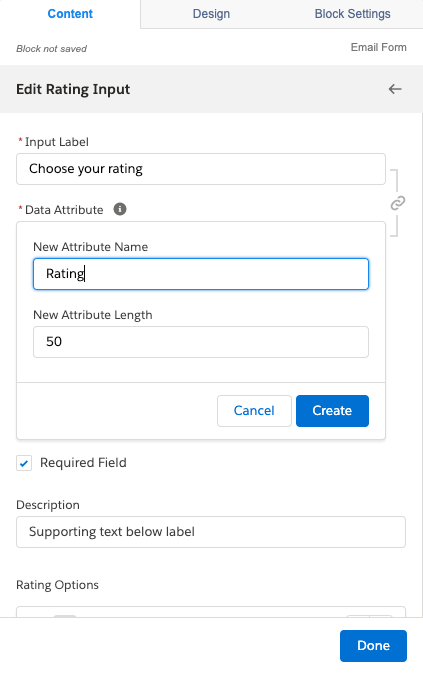
In this tutorial, because we have created a Data Extension within the Form Creation interface, we have no attributes in our Data Extension. Go ahead and click on “Create New Attribute”, give it a name and an attribute length (important: adding a new field in your form, you will be prompted to first choose a type for your data extension attribute!) Proceed with this “f” step for each field.
g. Then, edit the different requirements and content options that you want to set for this Input.

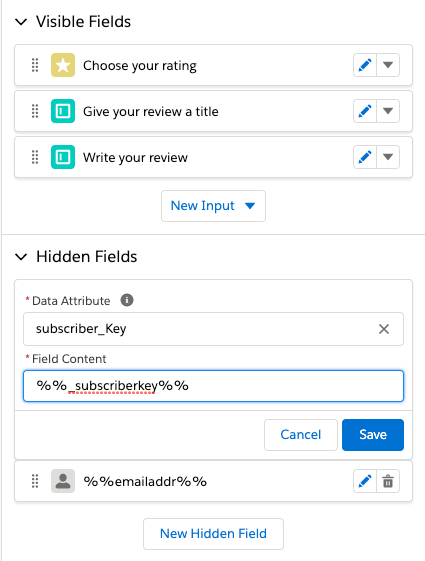
h. In this tutorial we will also add two Hidden Fields in order to pass subscriber’s information such as the Subscriber Key thanks to the AMPscript variable (%%_subscriberkey%%) or the Emaill Address (%%emailaddr%%).
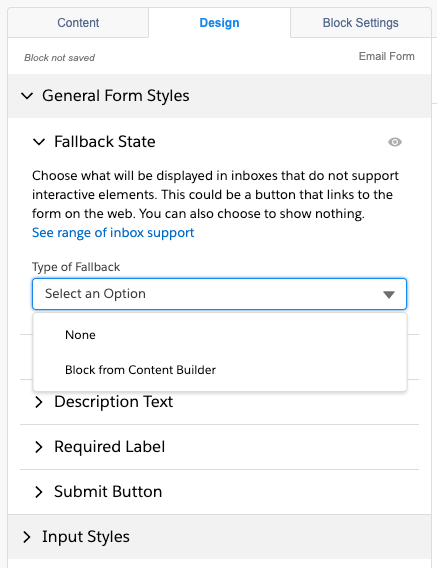
i. In the “Design” tab, take a particular attention at the Fallback State functionality. This functionality allows to show a different content for email clients that do not support interactive elements (such as our beloved friend Outlook…). You can either choose to show a “void” content (which is not recommended!) or a Block from Content Builder (i.e.: with a call to action to an alternative CloudPage or webpage hosting your form on the Web!).
Once you’re happy with the look & feel of the form…
3. Time for the send!
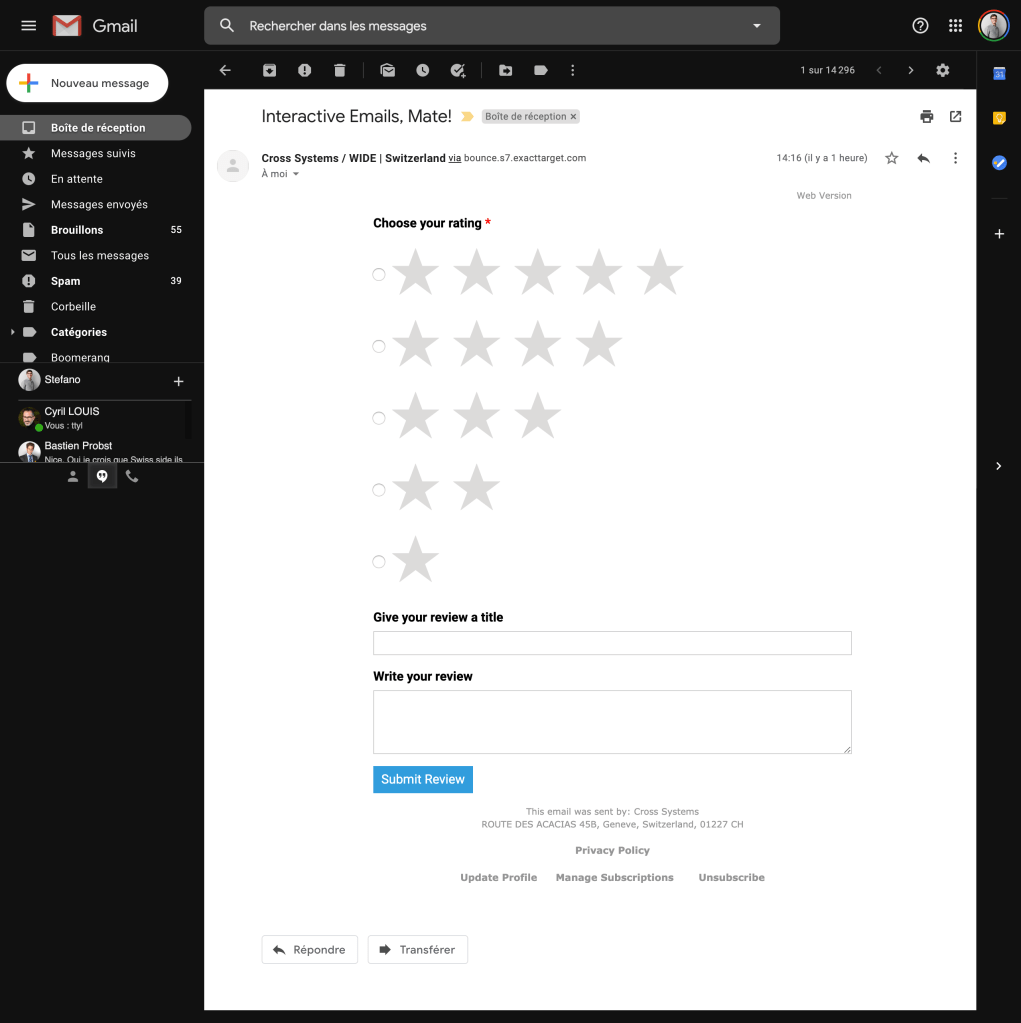
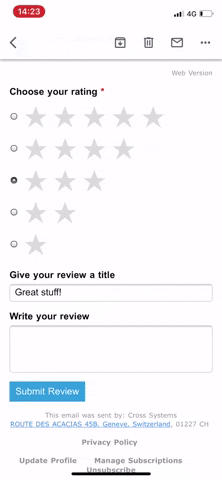
Here’s how the Interactive Email Form we have created in this tutorial appeared in my Gmail inbox. Seems like Google is more comfortable with radio buttons than animations 😛
What about Data?
Here is the result in the Data Extension created in this Tutorial.

As you can see, a specific Id has been randomly created for each submission, and the other record attributes are filled with the value inserted in the interactive form in Gmail (see Gif above).
The email address and Subscriber Key are passed as variable in the Hidden Fields through the URL and end up in the correct data extension attributes.
I hope this tutorial was useful and see you next time !
P.S.: a special kudo to Cyril Louis, Salesforce MVP, for his benevolence!
